How to work with TX Macro
Step1: Define macro text for sending
Step2: Fill in Tx Macro Boxes
Step3: Click tx text button to send composition of text
---------------------- Details -----------------------------
Step1:
To define a macro text for sending you may do "right mouse click" on
a tx text button
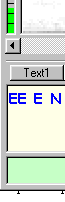
Example tx text button #1
Now enter your macro text. Example: confirmation of receipt of the
other station:
QSL <Box1> OK DR <Box2> in <Box3> UR
RST is <Box4> <Box4>
Step2:
To fill in Tx Macro Boxes you may click
menue View- Tx Macro
Example:
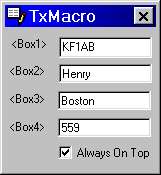
While recieving the other station you may fill in the Boxes with key
information like
Call
Name
Location
RST
Rapidly you can capture key infos: Just point the mouse to the part
of
received text you want to copy, press left mouse button and select
the desired
part of text. Rapidly in the moment you let mouse button up,
the selected text is
copied to clipboard. Now point your mouse to the TXMacro Box and paste
the text.
Step3: Click Tx text button to send composition
of text
Your composed confirmation of receipt (example) would look like this:
QSL KF1AB OK DR Henry in Boston UR RST is 559
559
--------------------------------------------------------------------------------------------------
Beside <Box#> you can insert <clip> into your macro text
<clip> is the the content of your clipboard
Example:
- content of your clipboard is "30 mph"
- macro text is: Windspeed here is currently <clip>
Result:
Windspeed here is currently 30 mph
Additional power tool:
There is a very nice "freeware clipboard" availabe:
http://www.cyber-matrix.com/
The program is called: Clipboard Magic
It works very well with MRP40.
The Clipboard Magic holds for you ten ore more pre defined text sequences.
One can even edit and save them to a file.
Clipboard Magic allows you to copy one selected line of info to the
clipboard.
You may use it together with the <clip> macro